Mfr Part # 4500
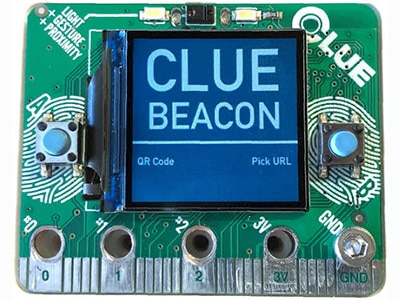
CLUE NRF52840 EXPRESS
Adafruit Industries LLC
License: See Original Project Displays LCD / TFT Wearables
Courtesy of Adafruit
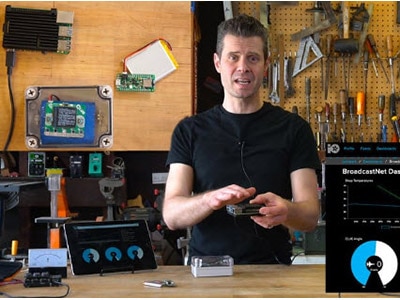
Guide by John Park
Overview
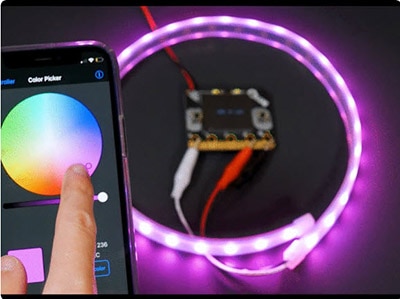
Send wireless MIDI continuous controller (CC) messages over the air to your favorite BLE synthesizer or synth app on iOS or mac os! This project uses the CLUE's built-in accelerometer and proximity sensor to send three different CC signals as you tilt and roll your hand.
Use the CLUE's TFT screen, buttons, and touch pads to select different CC numbers, and even pause/restart sending data while maintaining the BLE MIDI connection.
You can also change the sound of your synth entirely at the tap of a CLUE touchpad by sending Bank/Preset Program Change messages.
Parts
Other Materials
In addition to the parts above you'll also need:
CircuitPython on CLUE
CircuitPython is a derivative of MicroPython designed to simplify experimentation and education on low-cost microcontrollers. It makes it easier than ever to get prototyping by requiring no upfront desktop software downloads. Simply copy and edit files on the CIRCUITPY flash drive to iterate.
The following instructions will show you how to install CircuitPython. If you've already installed CircuitPython but are looking to update it or reinstall it, the same steps work for that as well!
Set up CircuitPython Quick Start!
Follow this quick step-by-step for super-fast Python power :)
Download the latest version of CircuitPython for CLUE from circuitpython.org
Click the link above to download the latest version of CircuitPython for the CLUE.
Download and save it to your desktop (or wherever is handy.)
Plug your CLUE into your computer using a known-good USB cable.
A lot of people end up using charge-only USB cables and it is very frustrating! So, make sure you have a USB cable you know is good for data sync.
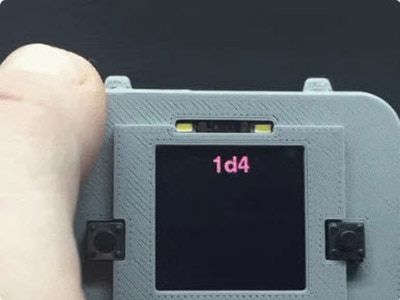
Double-click the Reset button on the top (magenta arrow) on your board, and you will see the NeoPixel RGB LED (green arrow) turn green. If it turns red, check the USB cable, try another USB port, etc. Note: The little red LED next to the USB connector will pulse red. That's ok!
If double-clicking doesn't work the first time, try again. Sometimes it can take a few tries to get the rhythm right!
You will see a new disk drive appear called CLUEBOOT.
Drag the adafruit-circuitpython-clue-etc.uf2 file to CLUEBOOT.
The LED will flash. Then, the CLUEBOOT drive will disappear, and a new disk drive called CIRCUITPY will appear.
If this is the first time, you're installing CircuitPython or you're doing a completely fresh install after erasing the filesystem, you will have two files - boot_out.txt, and code.py, and one folder - lib on your CIRCUITPY drive.
If CircuitPython was already installed, the files present before reloading CircuitPython should still be present on your CIRCUITPY drive. Loading CircuitPython will not create new files if there was already a CircuitPython filesystem present.
That's it, you're done! :)
Make the CLUE MIDI Glove
Text Editor
Adafruit recommends using the Mu editor for editing your CircuitPython code. You can get more info in this guide.
Alternatively, you can use any text editor that saves files.
Installing Project Code
To use with CircuitPython, you need to first install a few libraries, into the lib folder on your CIRCUITPY drive. Then you need to update code.py with the example script.
Thankfully, we can do this in one go. In the example below, click the Download Project Bundle button below to download the necessary libraries and the code.py file in a zip file. Extract the contents of the zip file, open the directory MIDI_CLUE_BLE_Glove/ and then click on the directory that matches the version of CircuitPython you're using and copy the contents of that directory to your CIRCUITPY drive.
Your CIRCUITPY drive should now look similar to the following image:
# SPDX-FileCopyrightText: 2020 John Park for Adafruit Industries
#
# SPDX-License-Identifier: MIT

"""
CLUE BLE MIDI
Sends MIDI CC values based on accelerometer x & y and proximity sensor
Touch #0 switches Bank/Preset patches
Touch #1 picks among the three CC lines w A&B buttons adjusting CC numbers
Touch #2 starts/stops sending CC messages (still allows Program Change)
"""
import time
from adafruit_clue import clue
import adafruit_ble
from adafruit_ble.advertising.standard import ProvideServicesAdvertisement
import adafruit_ble_midi
import adafruit_midi
from adafruit_midi.control_change import ControlChange
from adafruit_midi.program_change import ProgramChange

# from adafruit_midi.note_on import NoteOn
# from adafruit_midi.pitch_bend import PitchBend
import simpleio
import displayio
import terminalio
from adafruit_display_text import label
from adafruit_display_shapes.rect import Rect

# --- Pick your midi out channel here ---
midi_channel = 1
# --- Pick your MIDI CC numbers here ---
cc_x_num = 71
cc_y_num = 72
cc_prox_num = 73
# --- Pick Bank & Preset pairs here ---
touch_patch = [  # first number is the Bank, second is the Preset
    (4, 16),  # minimoog: Leads > Original MINI
    (5, 8),  # Pads > Intergalactic Pass
    (0, 13),  # Bass > Kraft Bass
    (6, 9),  # Percussion > Space Hat
]

patch_count = len(touch_patch)
patch_index = (
    patch_count - 1
)  # start on the last one so first time it is pressed it goes to first

cc_x = 0
cc_y = 0
cc_prox = 0

# Use default HID descriptor
midi_service = adafruit_ble_midi.MIDIService()
advertisement = ProvideServicesAdvertisement(midi_service)

ble = adafruit_ble.BLERadio()
if ble.connected:
    for c in ble.connections:
        c.disconnect()

midi = adafruit_midi.MIDI(midi_out=midi_service, out_channel=midi_channel - 1)

print("advertising")
ble.name = "CLUE BLE MIDI"
ble.start_advertising(advertisement)

clue.display.brightness = 1.0
clue.pixel.brightness = 0.2
screen = displayio.Group()

ORANGE = 0xCE6136
GRAY = 0x080808
BLACK = 0x121212
BLUE = 0x668190
SILVER = 0xAAAAAA
BROWN = 0x805D40

# --- Setup screen ---
# BG
color_bitmap = displayio.Bitmap(240, 240, 1)
color_palette = displayio.Palette(1)
color_palette[0] = GRAY
bg_sprite = displayio.TileGrid(color_bitmap, x=0, y=0, pixel_shader=color_palette)
screen.append(bg_sprite)
column_a = 20
column_b = 168
# positions that are distributed relative to cc_x and cc_prox y positions
row_a = 80
row_c = 170
row_b = int(row_a + ((row_c - row_a) / 2))
line_row_a = int(row_a + ((row_b - row_a) / 2))
line_row_b = int(row_b + ((row_c - row_b) / 2))
picker_box_row = [row_a, row_b, row_c]

# trim
top_trim_box = Rect(0, 0, 240, 8, fill=BROWN, outline=None)
screen.append(top_trim_box)
bottom_trim_box = Rect(0, 232, 240, 8, fill=BROWN, outline=None)
screen.append(bottom_trim_box)

# title text
title_label = label.Label(terminalio.FONT, text="MIDI CLUE", scale=4, color=SILVER)
title_label.x = 14
title_label.y = 27
screen.append(title_label)

# title box
title_box = Rect(0, 54, 240, 8, fill=BROWN, outline=None)
screen.append(title_box)

# cc x num
cc_x_num_label = label.Label(
    terminalio.FONT,
    text=("CC {}".format(cc_x_num)),
    scale=3,
    color=ORANGE,
)
cc_x_num_label.x = column_a
cc_x_num_label.y = row_a
screen.append(cc_x_num_label)

# cc x value
cc_x_label = label.Label(terminalio.FONT, text=str(cc_x), scale=3, color=ORANGE)
cc_x_label.x = column_b
cc_x_label.y = row_a
screen.append(cc_x_label)

# picker box
picker_box = Rect(3, row_a, 6, 6, fill=ORANGE, outline=None)
screen.append(picker_box)

# mid line
mid_line_a = Rect(0, line_row_a, 240, 2, fill=SILVER, outline=None)
screen.append(mid_line_a)

# cc y num
cc_y_num_label = label.Label(
    terminalio.FONT, text=("CC {}".format(cc_y_num)), scale=3, color=BLUE
)
cc_y_num_label.x = column_a
cc_y_num_label.y = row_b
screen.append(cc_y_num_label)

# cc y value text
cc_y_label = label.Label(terminalio.FONT, text=str(cc_y), scale=3, color=BLUE)
cc_y_label.x = column_b
cc_y_label.y = row_b
screen.append(cc_y_label)

# mid line
mid_line_b = Rect(0, line_row_b, 240, 2, fill=SILVER, outline=None)
screen.append(mid_line_b)

# cc prox num text
cc_prox_num_label = label.Label(
    terminalio.FONT,
    text=("CC {}".format(cc_prox_num)),
    scale=3,
    color=SILVER,
)
cc_prox_num_label.x = column_a
cc_prox_num_label.y = row_c
screen.append(cc_prox_num_label)

# cc prox value text
cc_prox_label = label.Label(terminalio.FONT, text=str(cc_prox), scale=3, color=SILVER)
cc_prox_label.x = column_b
cc_prox_label.y = row_c
screen.append(cc_prox_label)

# footer line
footer_line = Rect(0, 192, 240, 2, fill=SILVER, outline=None)
screen.append(footer_line)


# patch label
patch_label = label.Label(terminalio.FONT, text="Patch _", scale=2, color=BLUE)
patch_label.x = 4
patch_label.y = 216
screen.append(patch_label)

# footer label
footer_label = label.Label(terminalio.FONT, text="connect BLE", scale=2, color=ORANGE)
footer_label.x = 102
footer_label.y = 216
screen.append(footer_label)

# show the screen
clue.display.root_group = screen

cc_num_pick_toggle = 0  # which cc to adjust w buttons
cc_send_toggle = True  # to start and stop sending cc

debug = False  # set debug mode True to test raw values, set False to run BLE MIDI

while True:
    if debug:
        accel_data = clue.acceleration  # get accelerometer reading
        accel_x = accel_data[0]
        accel_y = accel_data[1]
        prox_data = clue.proximity
        print("x:{} y:{}".format(accel_x, accel_y,))
        print("proximity: {}".format(clue.proximity))
        time.sleep(0.2)

    else:
        print("Waiting for connection")
        while not ble.connected:
            pass
        print("Connected")
        footer_label.x = 80
        footer_label.color = BLUE
        footer_label.text = "BLE Connected"
        time.sleep(2)
        footer_label.x = 110
        footer_label.color = SILVER
        footer_label.text = "sending CC"

        while ble.connected:
            # Clue sensor readings to CC
            accel_data = clue.acceleration  # get accelerometer reading
            accel_x = accel_data[0]
            accel_y = accel_data[1]
            prox_data = clue.proximity

            # Remap analog readings to cc range
            cc_x = int(simpleio.map_range(accel_x, -9, 9, 0, 127))
            cc_y = int(simpleio.map_range(accel_y, 0, 9, 0, 127))
            cc_prox = int(simpleio.map_range(prox_data, 0, 255, 0, 127))

            # send all the midi messages in a list
            if cc_send_toggle:
                midi.send(
                    [
                        ControlChange(cc_x_num, cc_x),
                        ControlChange(cc_y_num, cc_y),
                        ControlChange(cc_prox_num, cc_prox),
                    ]
                )
            cc_x_label.text = str(cc_x)
            cc_y_label.text = str(cc_y)
            cc_prox_label.text = str(cc_prox)

            # If you want to send NoteOn or Pitch Bend, here are examples:
            # midi.send(NoteOn(44, 1column_a))  # G sharp 2nd octave
            # a_pitch_bend = PitchBend(random.randint(0, 16383))
            # midi.send(a_pitch_bend)

            if clue.button_a:
                if cc_num_pick_toggle == 0:
                    cc_x_num = cc_x_num - 1
                    cc_x_num_label.text = "CC {}".format(cc_x_num)
                    time.sleep(0.05)  # Debounce
                elif cc_num_pick_toggle == 1:
                    cc_y_num = cc_y_num - 1
                    cc_y_num_label.text = "CC {}".format(cc_y_num)
                    time.sleep(0.05)
                else:
                    cc_prox_num = cc_prox_num - 1
                    cc_prox_num_label.text = "CC {}".format(cc_prox_num)
                    time.sleep(0.05)

            if clue.button_b:
                if cc_num_pick_toggle == 0:
                    cc_x_num = cc_x_num + 1
                    cc_x_num_label.text = "CC {}".format(cc_x_num)
                    time.sleep(0.05)
                elif cc_num_pick_toggle == 1:
                    cc_y_num = cc_y_num + 1
                    cc_y_num_label.text = "CC {}".format(cc_y_num)
                    time.sleep(0.05)
                else:
                    cc_prox_num = cc_prox_num + 1
                    cc_prox_num_label.text = "CC {}".format(cc_prox_num)
                    time.sleep(0.05)

            if clue.touch_0:
                patch_index = (patch_index + 1) % patch_count
                midi.send(  # Bank select
                    [
                        ControlChange(0, 0),  # MSB
                        ControlChange(32, touch_patch[patch_index][0]),  # LSB
                    ]
                )
                midi.send(ProgramChange(touch_patch[patch_index][1]))  # Program Change
                patch_label.text = "Patch {}".format(patch_index + 1)
                time.sleep(0.2)

            if clue.touch_1:
                cc_num_pick_toggle = (cc_num_pick_toggle + 1) % 3
                picker_box.y = picker_box_row[cc_num_pick_toggle]
                time.sleep(0.1)

            if clue.touch_2:
                cc_send_toggle = not cc_send_toggle
                if cc_send_toggle:
                    footer_label.x = 110
                    footer_label.color = SILVER
                    footer_label.text = "sending CC"
                else:
                    footer_label.x = 114
                    footer_label.color = ORANGE
                    footer_label.text = "CC paused"
                time.sleep(0.1)

        print("Disconnected")
        print()
        ble.start_advertising(advertisement)
How It Works
The code does a few key things at startup:
Sending Data
Once a connection has been established between the CLUE and a BLE MIDI device, here's what takes place:
CLUE UI
The CLUE's buttons and touch pads act as user inputs to adjust these things:
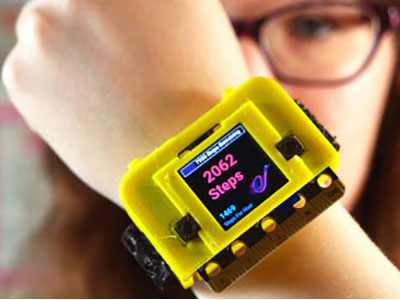
Build the Glove
Now that the CLUE is coded, you'll want to attach it to a glove back. You can use some double-stick foam tape or adhesive Velcro to attach it, or even a few stitches of strong thread.
You can also attach the battery pack the same way, or simply hold it in your hand during use.
Use the MIDI Glove
To use the Power Glove MIDI controller with a mac os machine, follow these setup instructions.
On iOS devices, you can use the MIDI Wrench app to create and test the BLE MIDI connection, and then use it to "port" the MIDI messages to other apps, such as AudioKit Synth One and Moog Minimoog which you can see in action below:
Most of these software synths will provide a way to map CC values to any function you like, often with a "MIDI learn" mode as well as explicit number entry.
You can also use BLE MIDI with some hardware synthesizers, as well as with BLE MIDI add-on dongles, such as this one from Yamaha which adds BLE MIDI to synths with classic DIN-5 MIDI.